
The clock is ticking, and your team is trailing. This is the moment for a decisive shift in strategy. In soccer, this shift is called adopting risk-on tactics.
It means moving from a balanced approach to a deliberately aggressive, goal-pursuing mode. The decision to go all-in isn’t made lightly. Key triggers include the scoreline, the time remaining on the clock, and which side has the current momentum.
Safe aggression is the key idea here. This is not reckless abandon. It is a calculated increase in risk. You commit more players forward while maintaining a foundational defensive structure.
The goal is to create overwhelming pressure without leaving your team exposed to a catastrophic counter-attack. Mastering this high-stakes switch is what separates good teams from great ones. The following sections will break down the specific implementations of these risk-on tactics.
Overloads: 3v2 wide/box flood
Two key overload strategies for late-game pushes are the 3v2 wide and the box flood. Both aim to create sudden, local numerical advantages. This forces defenders into tough decisions and opens up scoring chances.
The idea is simple. You send more players to an attack zone than the opponent has defenders. This overloads their defense. Success relies on precise timing and coordinated player movement.
Executing the 3v2 Wide Overload
This tactic targets a flank. A full-back, winger, and central midfielder attack against two opposing wide defenders. The goal is to isolate them and create a crossing or cut-back opportunity.
First, the full-back provides width and receives the ball. The winger then moves inside, drawing a defender. This opens space for the overlapping full-back. The central midfielder makes a supporting run into the half-space.
The passer now has three options. This 3v2 scenario overwhelms the two defenders. Key triggers are a defender being out of position or a successful switch of play. The main risk is leaving your own flank exposed to a counter-attack.
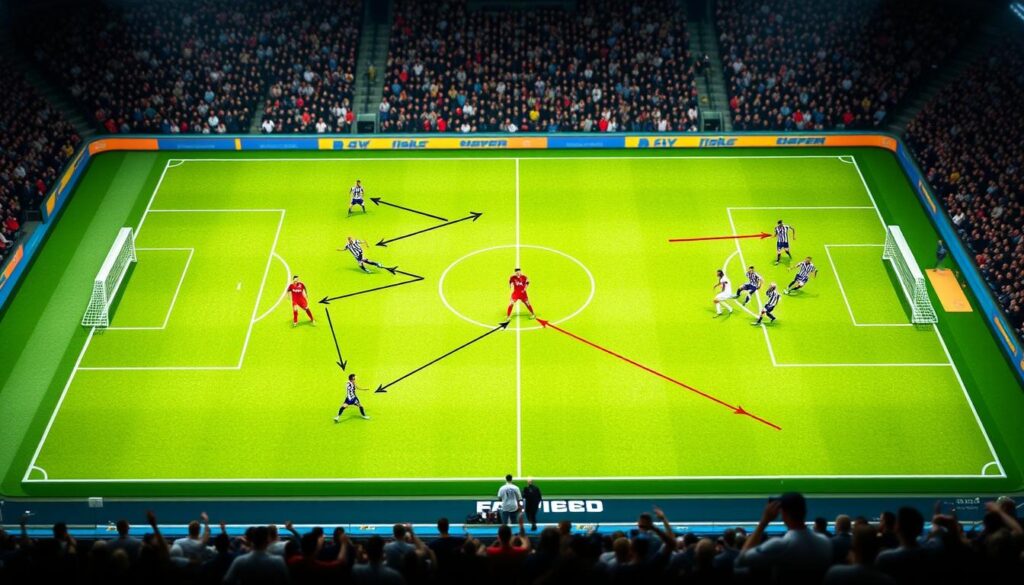
This is a direct, vertical strategy used during crosses. Four or five attackers sprint into the opponent’s penalty area. They aim to outnumber defenders on second balls and rebounds.
Timing is everything. Attackers must arrive as the cross is delivered. Different players attack different zones. One attacks the near post, another the far post. A third lingers for knockdowns.
This overloads the box and creates chaos. Defenders struggle to mark everyone. The trigger is often a full-back or winger in a good crossing position. The big risk is losing the ball. Your team is now very vulnerable to a fast break.
| Tactic | Primary Objective | Key Player Movements | Major Risk |
|---|---|---|---|
| 3v2 Wide Overload | Isolate defenders on a flank to create crossing chances | Full-back overlaps, winger cuts inside, midfielder supports | Exposed flank for counter-attacks |
| Box Flood Overload | Outnumber defenders in the penalty area for second balls | Multiple attackers sprint into defined zones (near post, far post, penalty spot) | Extreme vulnerability to counter-attacks if possession is lost |
Choosing between these overloads depends on the game context. Use the 3v2 wide to stretch play. Use the box flood to bombard a packed defense. Both require practice and player understanding to be effective.
Adding a Striker vs. Advancing a CB
Coaches often face a tough decision for their final push. They must choose between bringing on a fresh attacker or sending a center-back into the game. This choice shapes your team’s last attack.
Choosing to add a striker is a direct move. You bring in a player with high energy and a knack for scoring. This can change the game in the penalty area, thanks to their skill in aerial battles. The new striker puts pressure on tired defenders and creates a new problem for the opponent’s defense.
The other option is to move a center-back into midfield or forward. This is common in a three-at-the-back setup. It adds a player in key areas without using a substitution. It surprises the opponent but weakens your defense.
It’s not about which is better. It’s about what’s right for your team. Adding a striker gives you a fresh attacker but uses a valuable resource. Moving a CB changes your team’s shape but puts pressure on the player.
Your choice depends on three things:
- Player Profiles: Does your substitute striker offer a unique threat? Is your center-back comfortable and effective in advanced positions?
- Opponent Fatigue: Will a new, energetic runner exploit tired legs? Or would an unexpected tactical shift confuse a well-organized defense?
- Available Substitutes: How many changes do you have left? Do you need to save one for an injury? Using a sub is a permanent commitment.
Mastering this offensive strategy for the dying minutes means reading the game. The best choice for your final push balances immediate threat with the risk you’re willing to carry at the back.
Direct Play with Rest Defense Math
The secret to keeping the pressure up is finding a balance. This balance is between being aggressive and having a safety net called rest defense. Just kicking the ball forward when you’re down is not smart. But playing direct is a well-thought-out plan.
Rest defense is about players who stay back, ready to stop a counter-attack. They wait to defend while the team attacks. Even the most bold risk-on tactics need this base.

Always do the math. A key rule is to have at least three players as your main defense. This usually includes your center-backs and a holding midfielder. They protect against a sudden opponent attack.
Think about this setup when you send a long ball to a target striker:
- Commit with purpose: Send two or three players to support the striker and fight for the second ball.
- Anchor with numbers: Choose your three rest defenders and tell them to stay put.
- Communicate roles: Clearly tell who attacks the space and who defends.
This balance lets you attack dangerous areas without being left exposed. The math is strict. Giving up all defense for one more attacker usually means conceding.
Good direct play isn’t about ignoring structure. It’s about using your resources wisely. By setting up your rest defense math, you make bold, risk-on moves work for the last minutes of a game.
Clock, Cards, and VAR Awareness
A team’s final push can fail for many reasons. Time, cards, and VAR are big factors. The last minutes need a special kind of smart play.
Knowing when to commit a tactical foul is key. Losing the ball high up can lead to a counter-attack. A calculated foul in midfield can stop the opponent’s attack. It’s all about who does it and where.
Also, watch out for time-wasting by the other team. Goalkeepers and players might slow down. Your team needs to:
- Press the goalkeeper and throw-in taker relentlessly, forcing hurried, inaccurate passes.
- Immediately retrieve the ball and place it for a quick restart after fouls or out-of-bounds.
- Politely but persistently remind the referee to add on all wasted time at the half’s end.
This keeps the game moving and pressure on the other team.
VAR Awareness is also key today. Every challenge in the penalty area is reviewed. Players must avoid reckless tackles.
Managing clock, cards, and VAR is essential for success. Clear communication and cool heads are needed. Making the right strategic adjustments can save your team’s efforts. A disciplined team keeps its attack strong without major setbacks.
Two Final Five-Minute Blueprints
When time is running out, a well-practiced plan is key. Blueprint A sets your team in a 2-3-5 formation with the ball. Your full-backs go up high, acting as pure wingers. Your midfielders and the striker rush to the penalty area, forming a strong front line.
The plan is clear. The game moves fast, with quick passes to the advanced wingers. They aim to send early crosses into the box. This creates overloads in wide areas and in front of goal. Everyone knows their role.
Blueprint B is all about the “lob and chase” tactic. Your goalkeeper joins the midfield, becoming an 11th player. Your tallest players head to the opponent’s penalty area. The rest of the team is ready to grab second balls.
The goal is simple. Any player with the ball should aim for the crowded box. The aim is to cause chaos and get rebounds. Players need to be quick to react to any loose ball. This method skips over midfield pressure.
Having a solid plan for the last five minutes helps avoid uncertainty. These blueprints need total commitment from every player. They turn last-minute hopes into a well-organized, safe attack.